There is a time for everything, and a season for every activity under the heavens ~ Ecclesiastes 3:1 Happy fall, everyone! To celebrate this new season, I have created a pumpkin door ornament. I like creating patterns, and it is a new season, so I thought I would try to make one too celebrate. There were a few complications that I did not anticipate, but I have added insight and instruction so you can avoid my mistakes. Thank God, that He gave us the ability to think critically through problems and the creativity to work with the situation we find ourselves in! If any of you are interested in making something similar, read the tips at the bottom before you start for some suggestions and things to avoid or change. If you do make something similar, or something fall-themed, I would love to see it!
I inherited some fusible quick grid from my Gramma’s extensive stash of quilting items. I was not for sure how to use the fusible quick grid at first, but after reading the instructions, the idea for the pumpkin door ornament came to life. The fusible quick grid is a time-saver, stress reliever, and easy to use. I would highly recommend it! This project is small, thus, you can probably finish the whole project without buying a single piece of fabric if you have a nice stash at home.
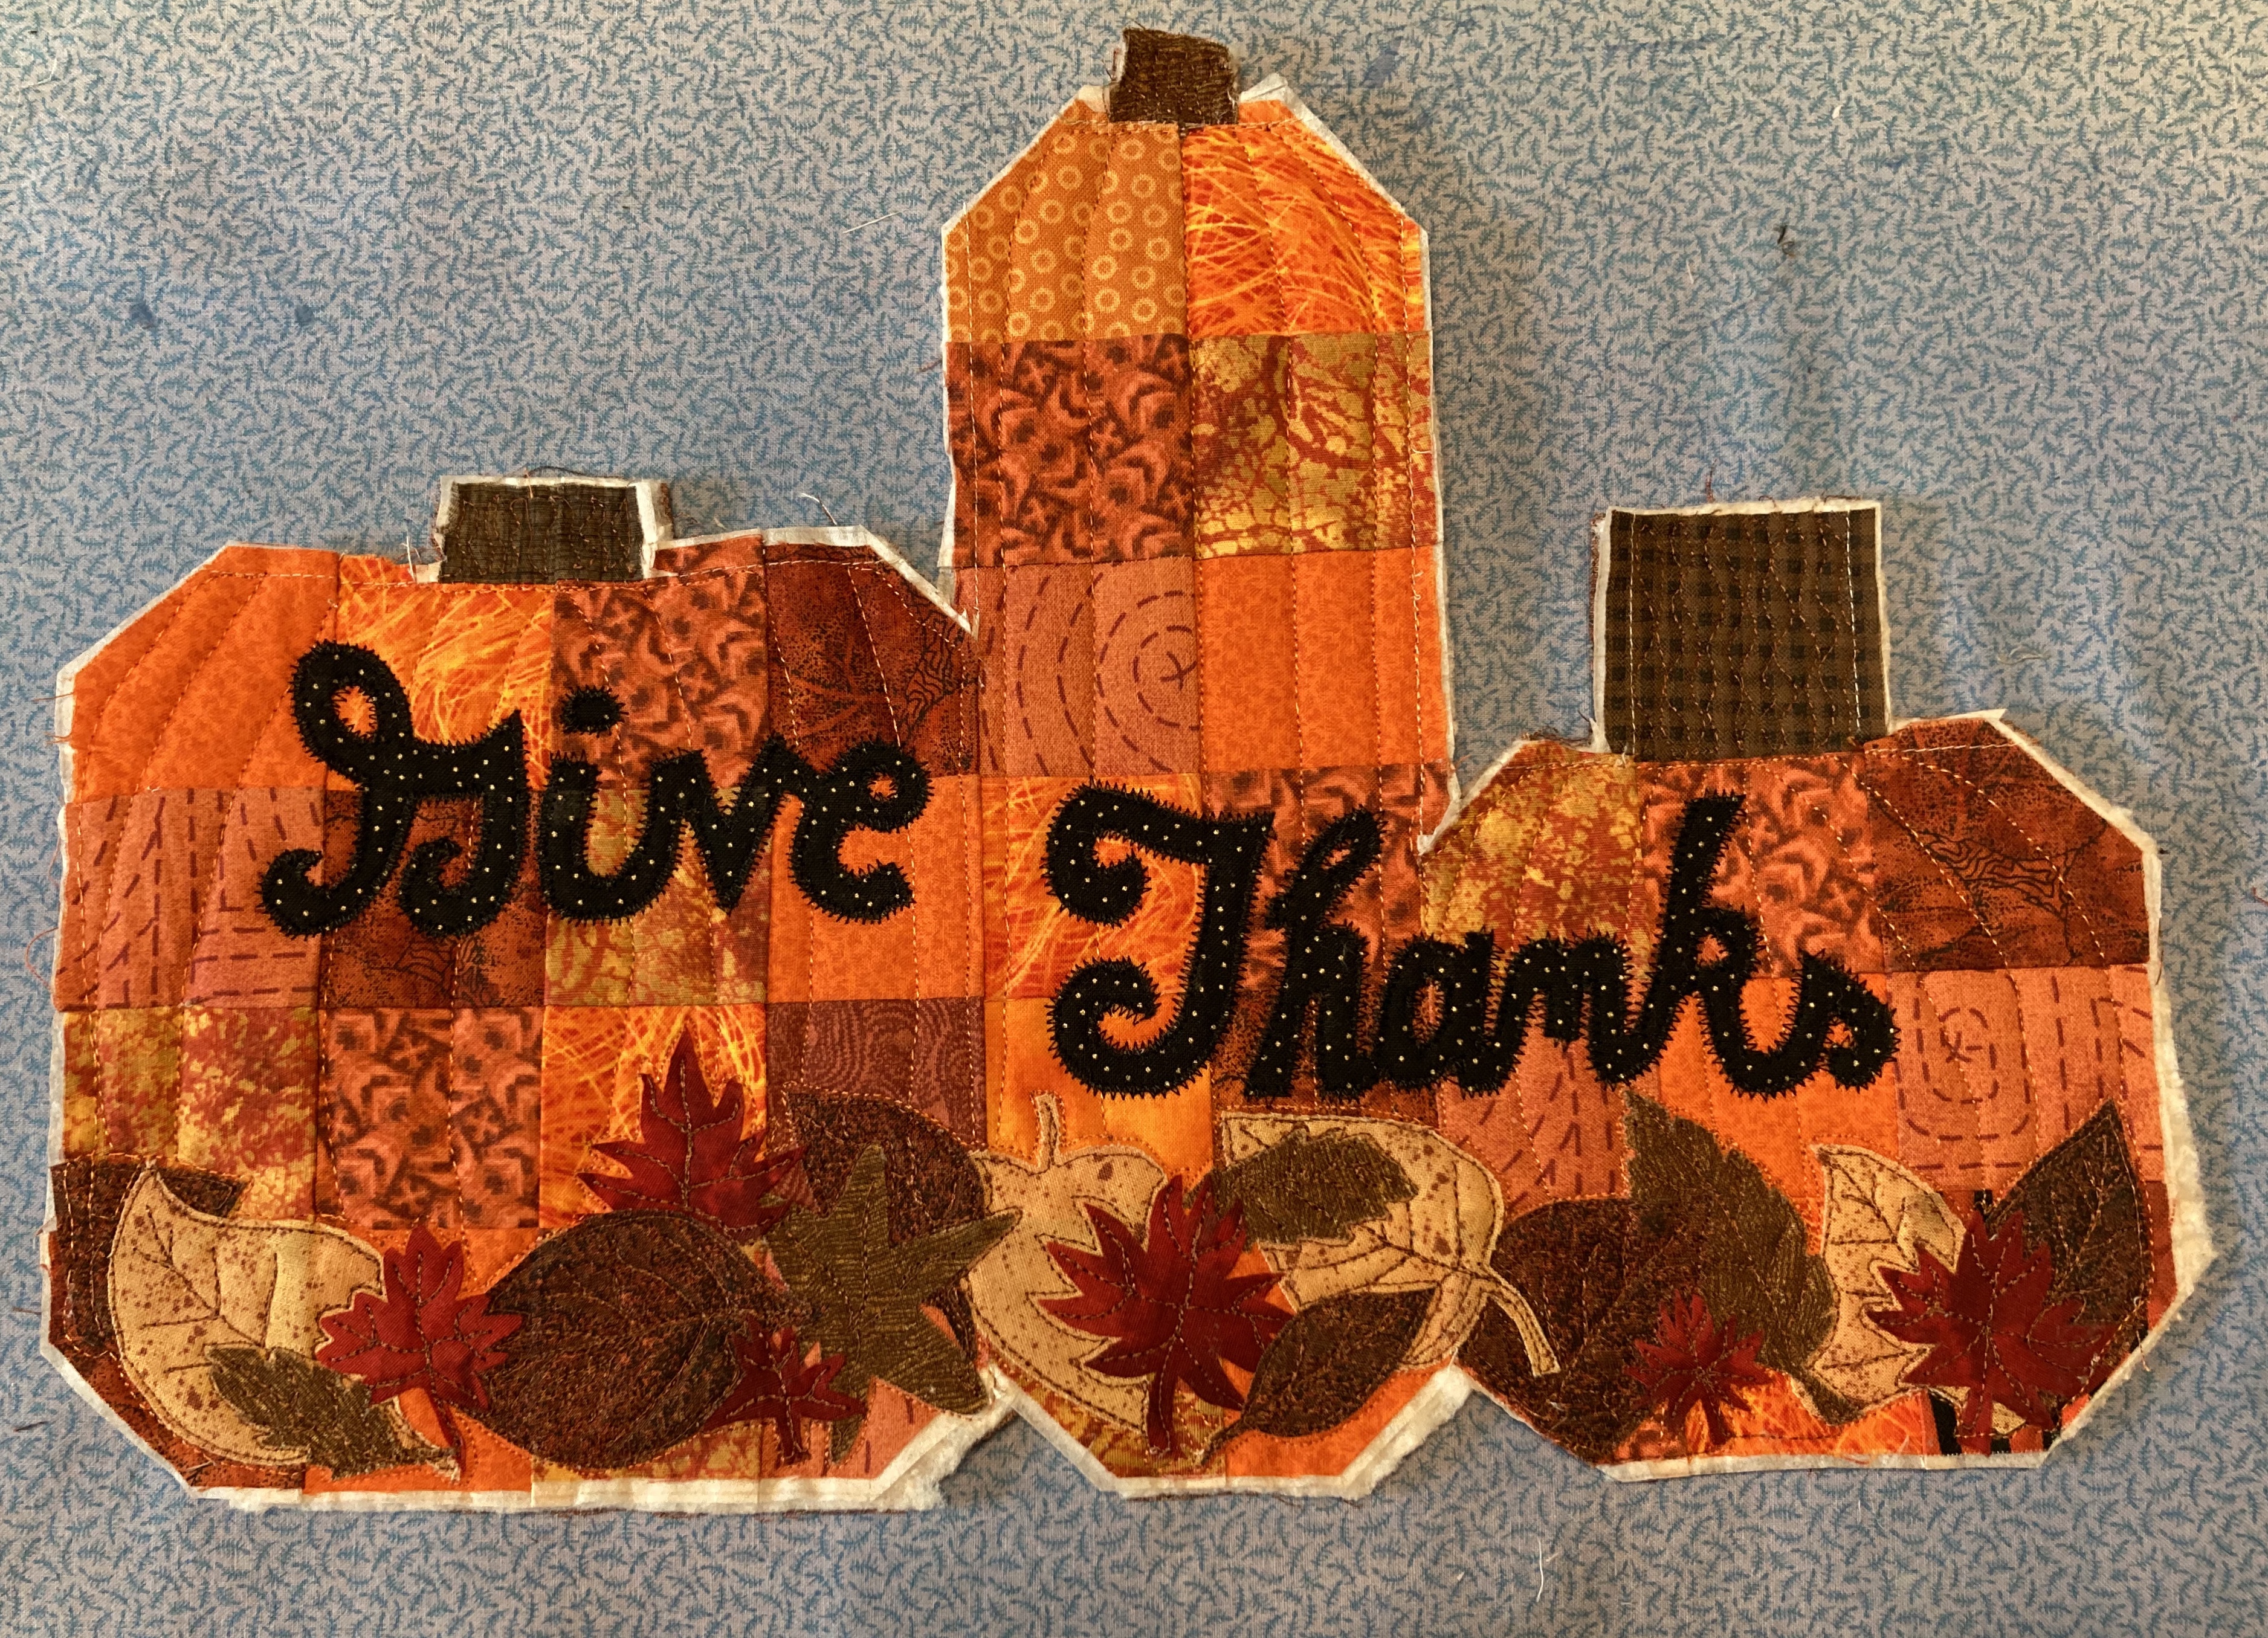
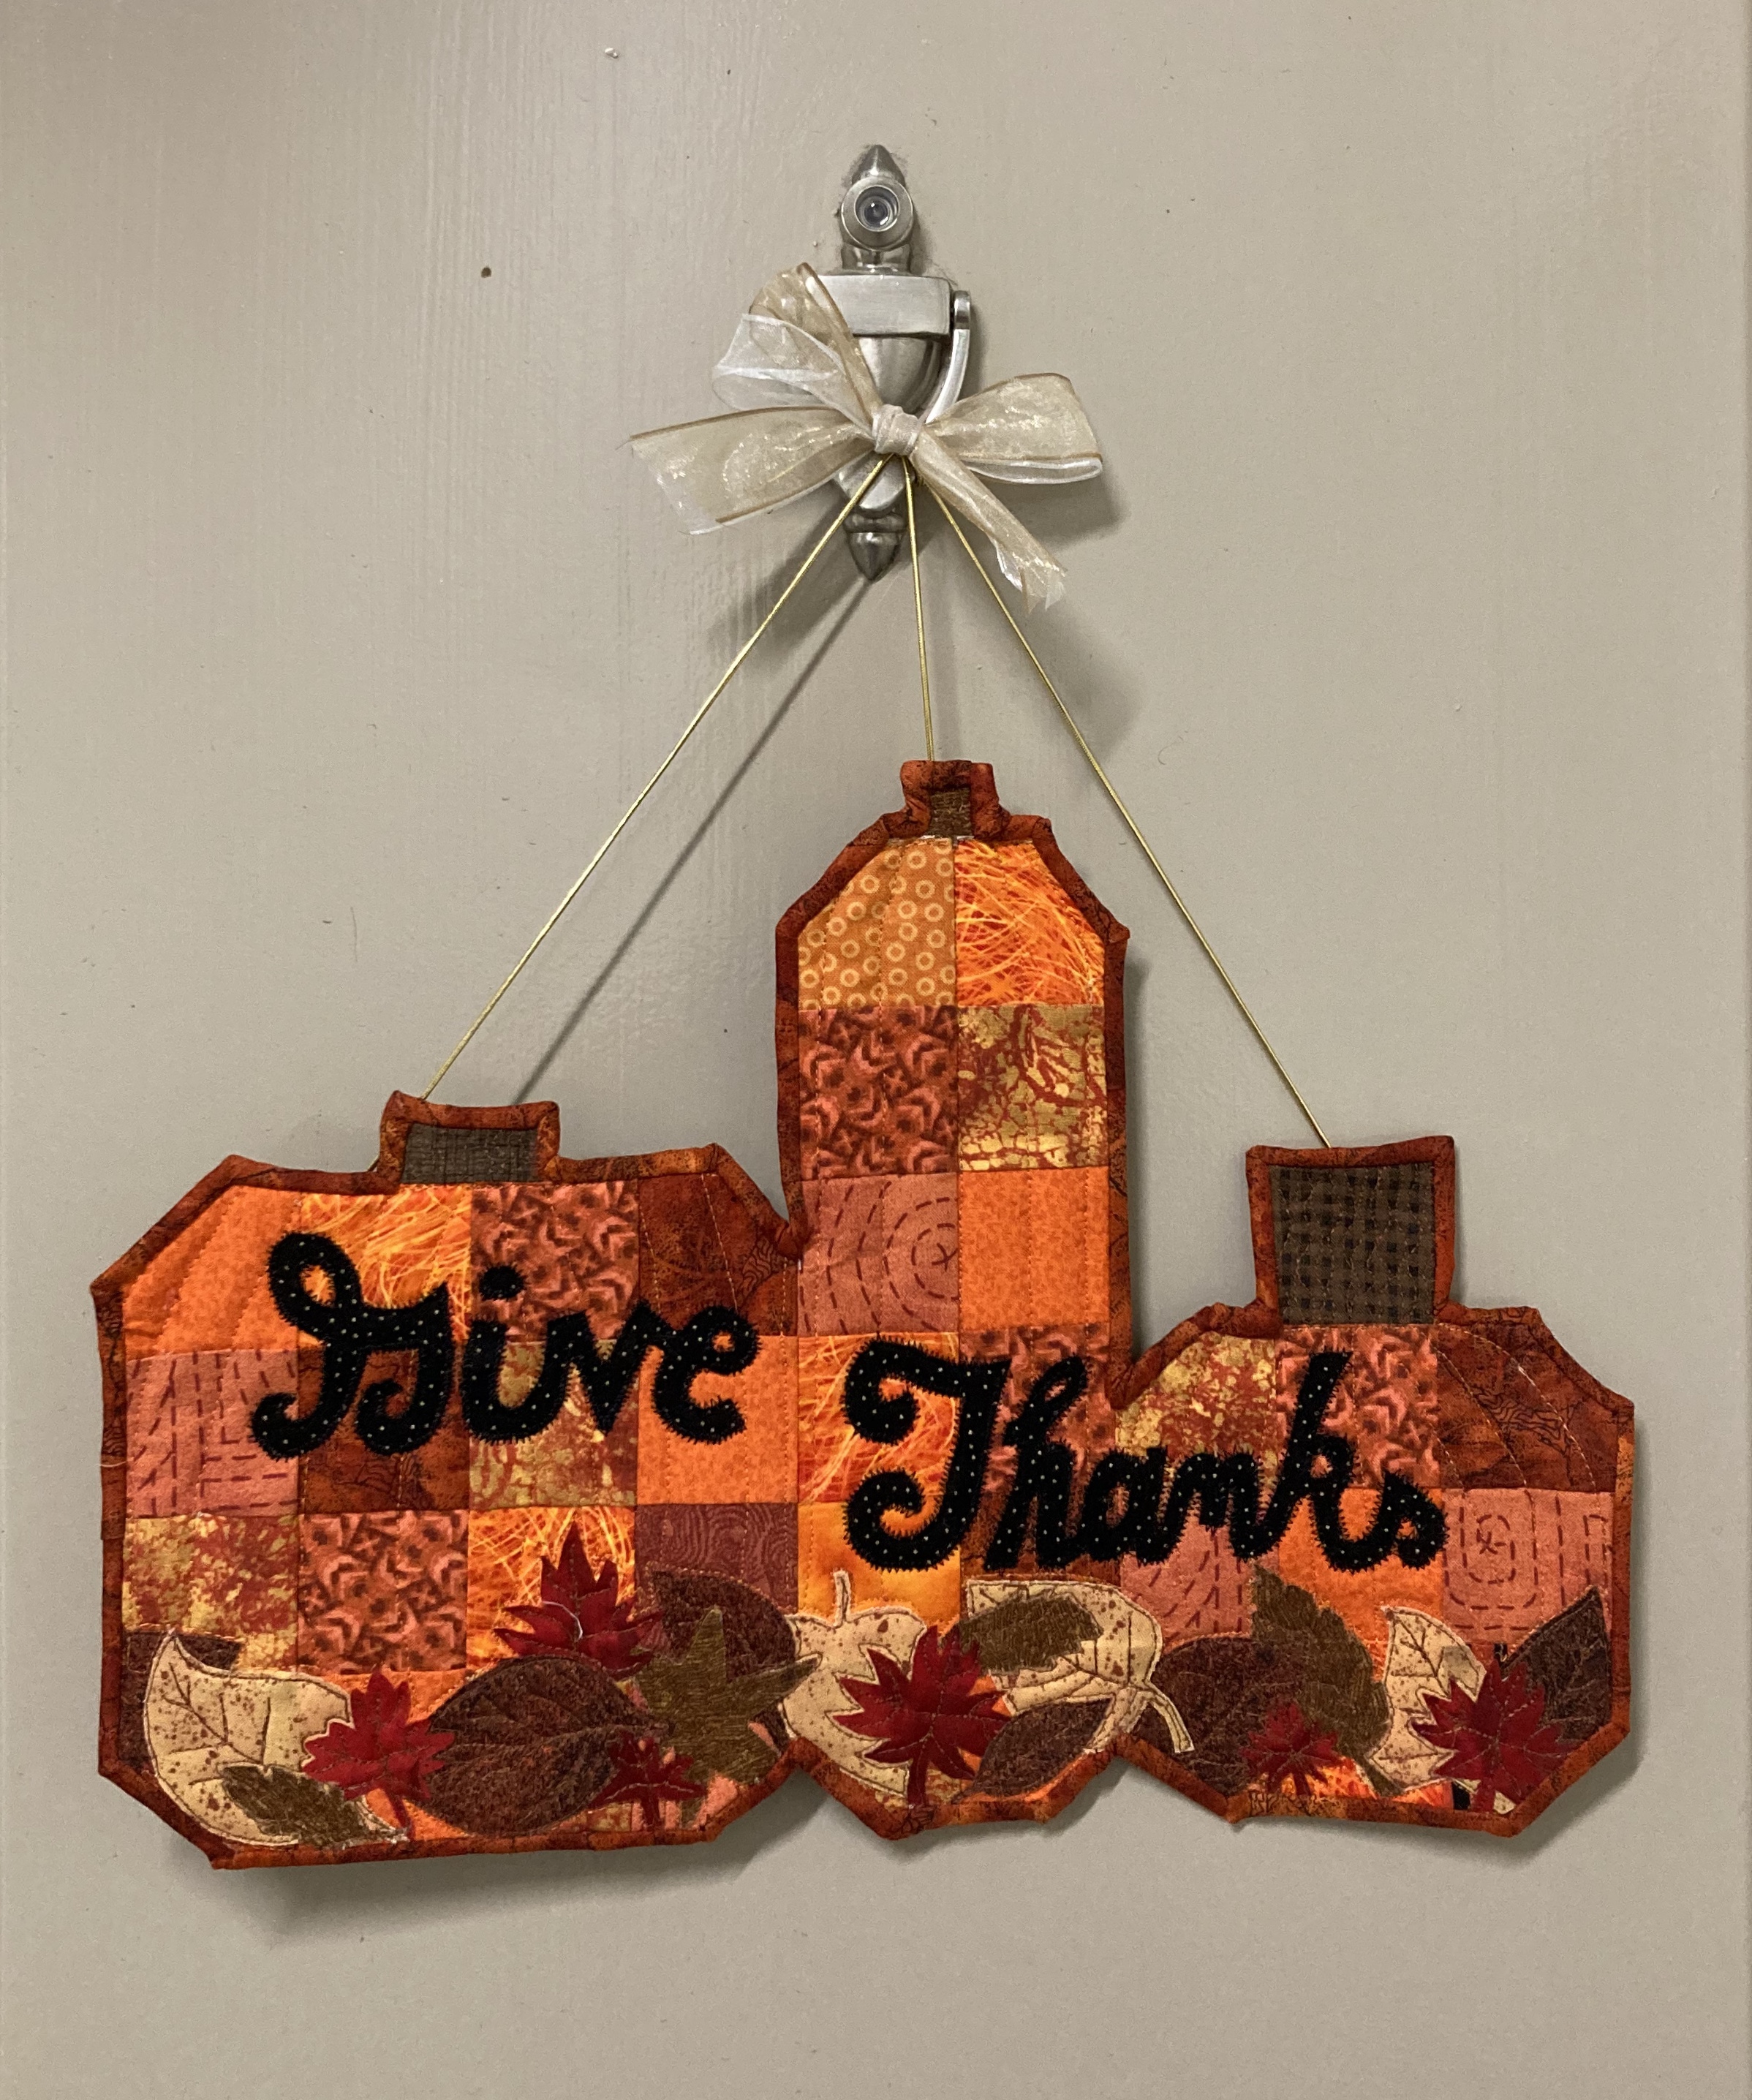
Steps to make the Pumpkin “Give Thanks” Door Ornament
Once finished, this door ornament measures around 10” tall and 13 1/2 ” wide {Tip 5}.
- Pick out an assortment of orange fabrics (I used about 5 main fabrics with a couple of squares from my scraps stash), and 1-3 browns. Optional: 1 black and assortment of yellow, red, and brown for leaves
- Cut 37 – 1 7/8” orange squares (read the fusible quick grid instructions, you may need to cut 2” squares. If you are not using the fusible quick grid instructions, cut 2” squares instead)
- Cut 3 – 1 7/8” brown squares for stems (I used different sized stems; however, they ended up being very small and difficult to work with. If you would like to create different sized stems, I would recommend cutting them no smaller than 1 1/2”. I forgot seam allowance when I created the very small stem for the middle pumpkin, and I had to replace it.) {Tip 1}
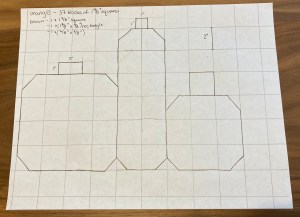
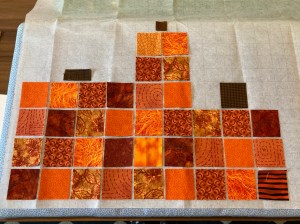
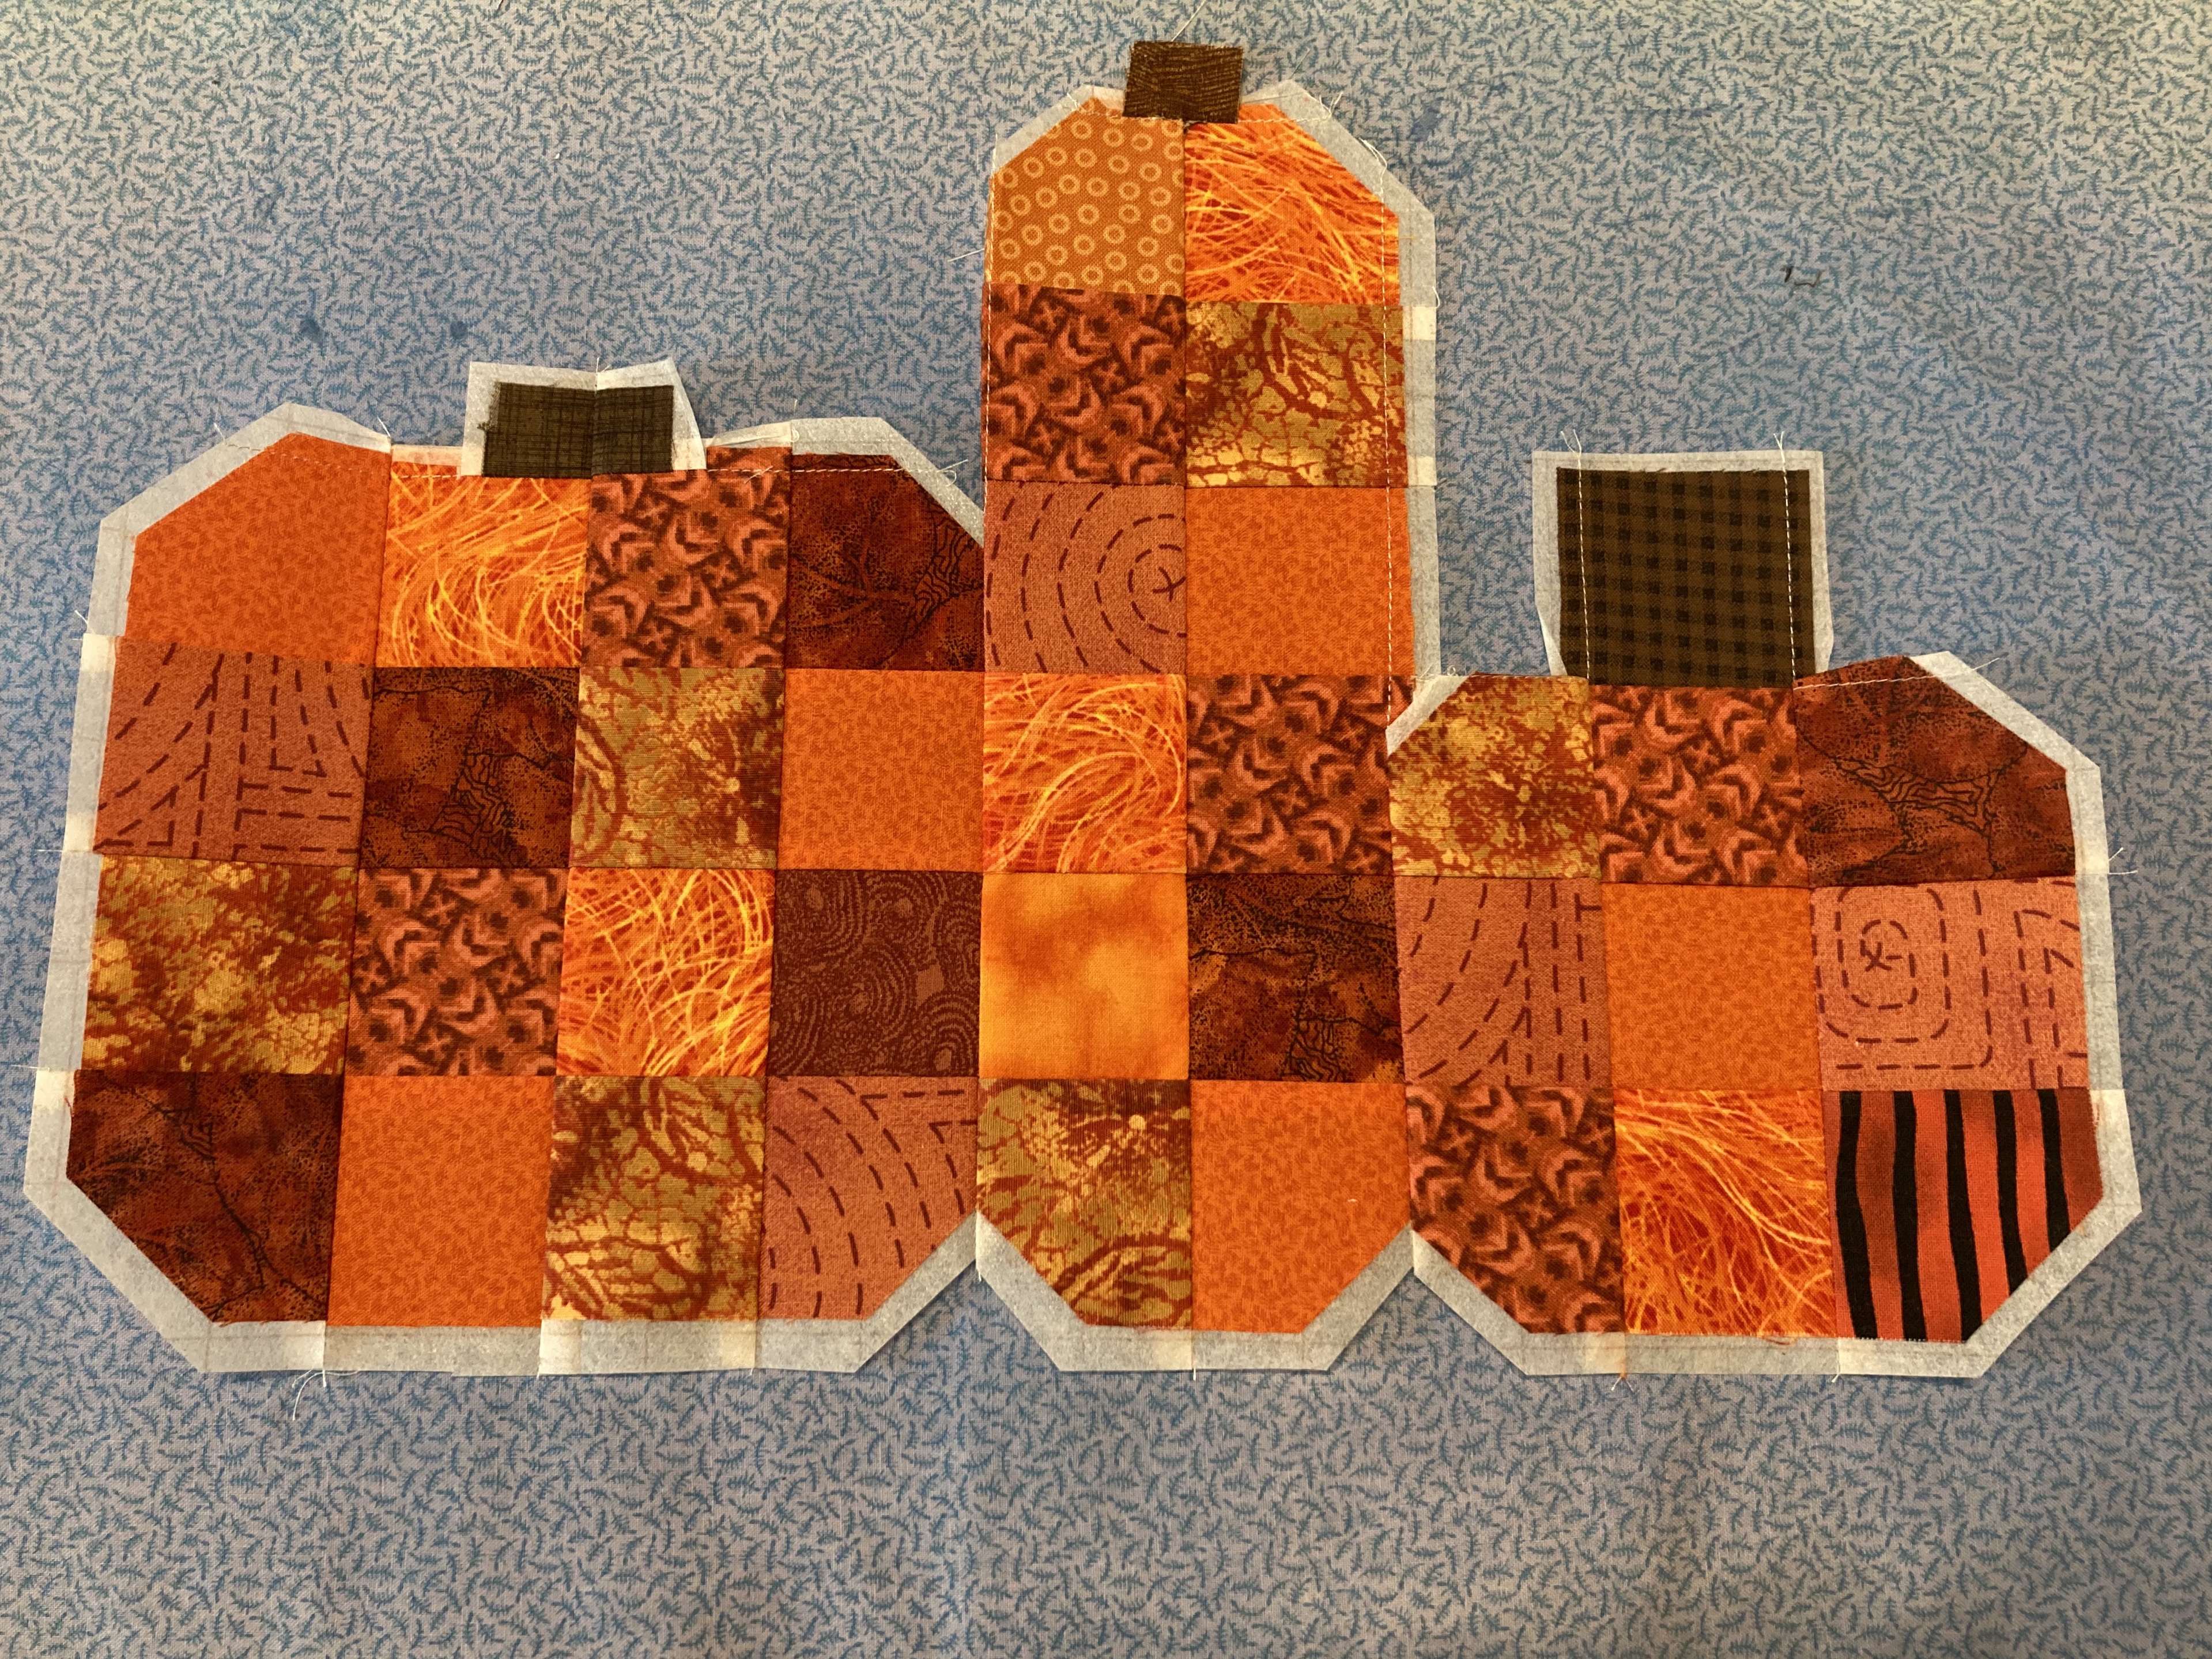
- Place an assortment of orange squares to create three pumpkins. Have fun rearranging to your liking! (See Image 1 for pattern)
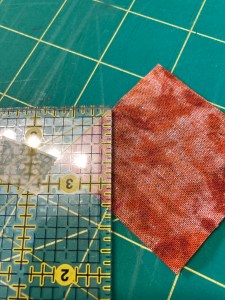
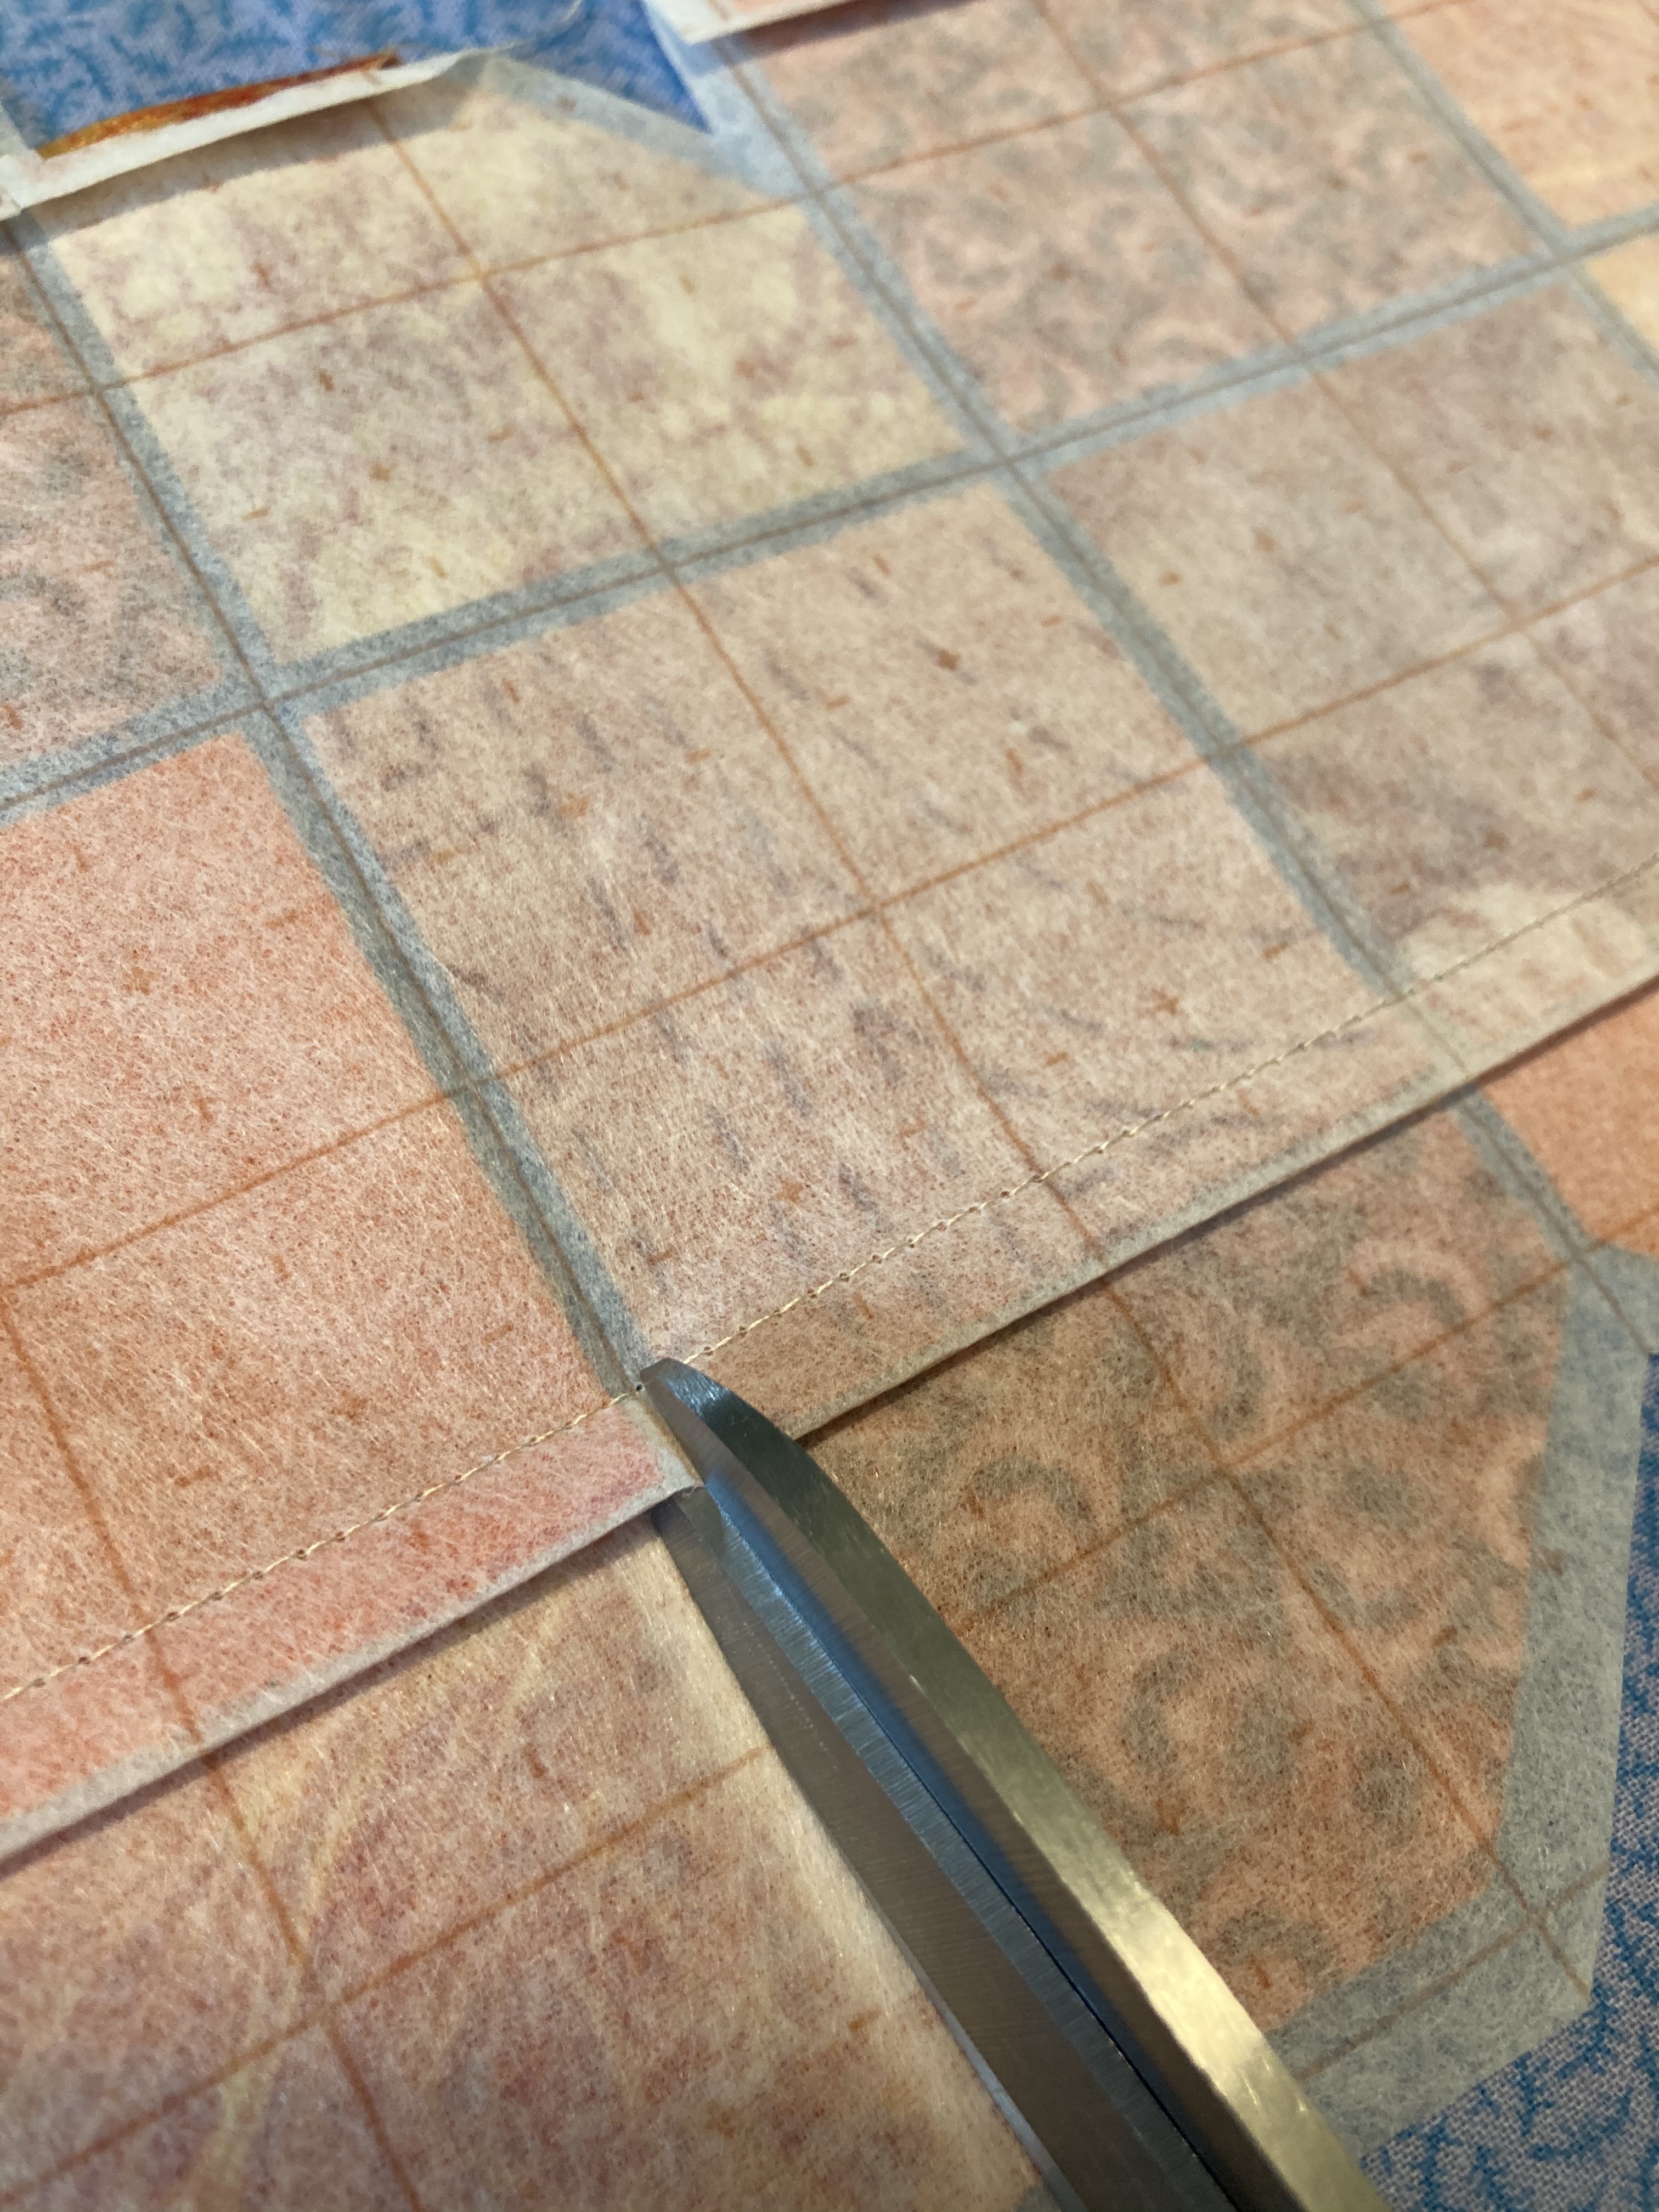
- Option: If you are happy with the square pumpkins, skip to step 6! If you want to add corners to your pumpkins, you will need a ruler, marking pencil, and some extra patience {Tip 2}. On each of the corner squares, mark halfway on two touching sides (that would be 15/16” from one corner). Align your ruler to connect your marks, then cut the small corner off (See Image 4).


6. Follow the fusible quick grid instructions to sew the rows of the pumpkins together. This video is a helpful step by step instruction in using the fusible quick grid. (Note: I did not use this company’s specific fusible quick grid, but I found the video helpful. ) See Images 6-8.

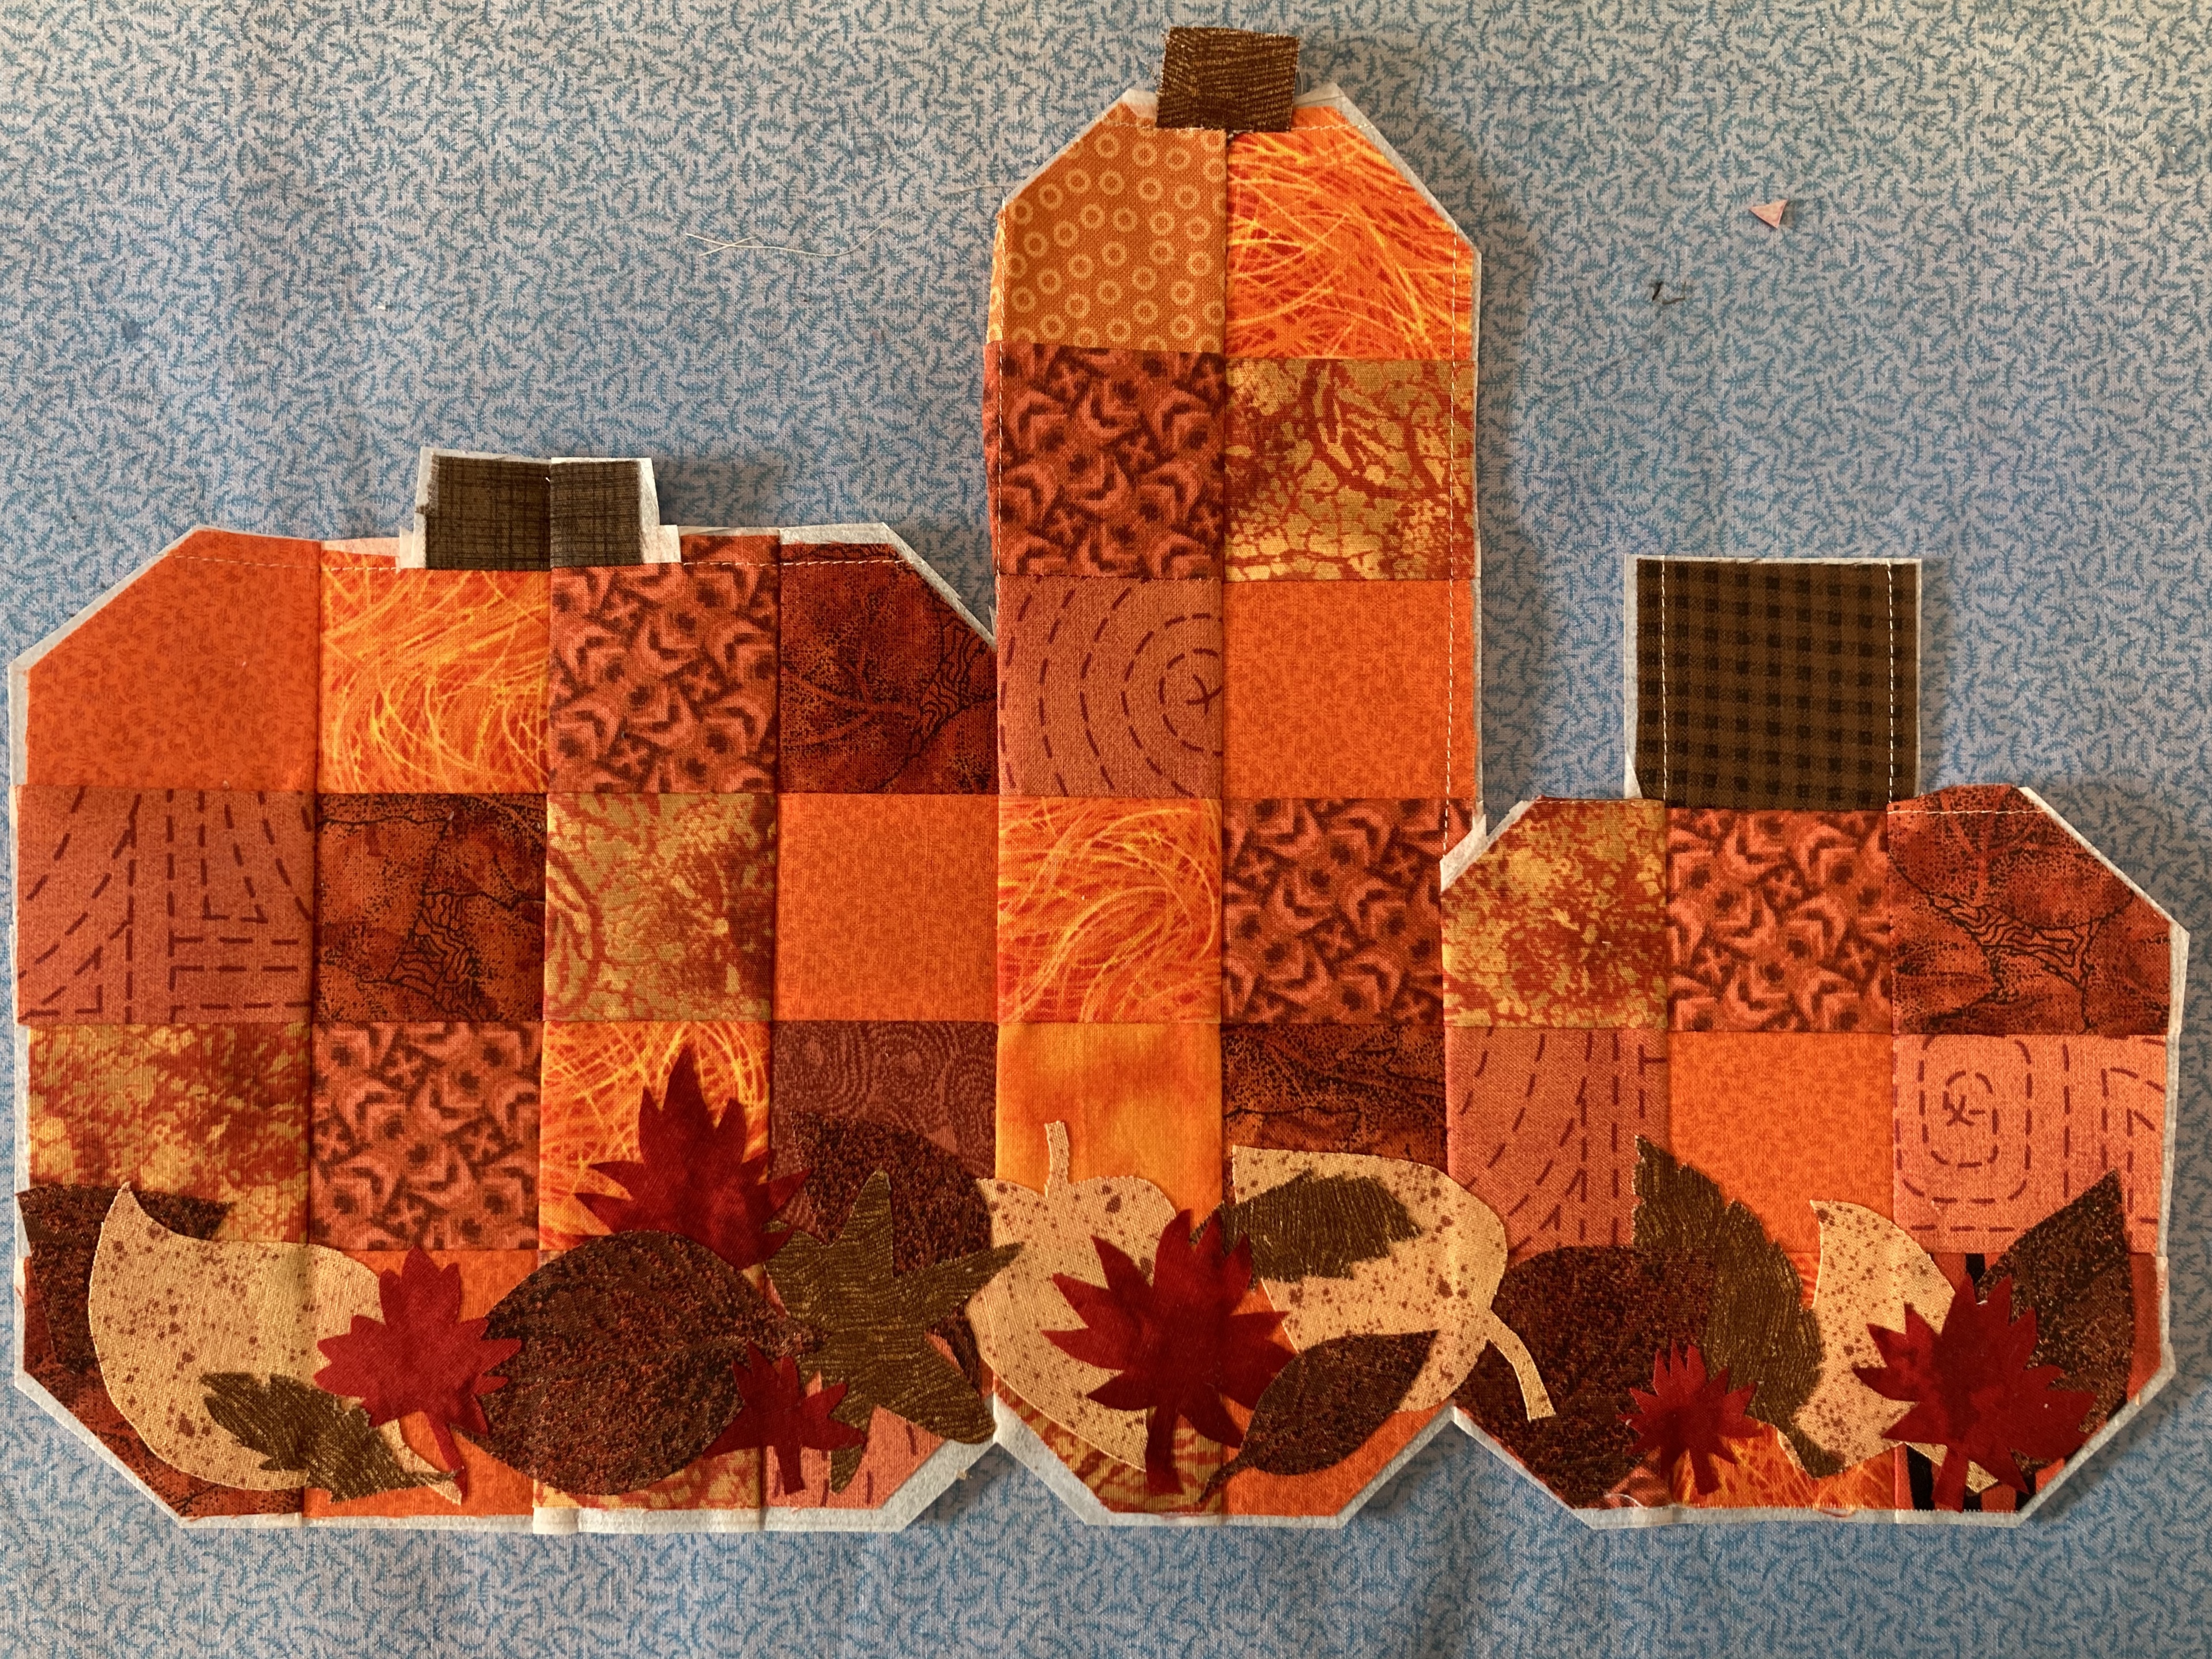
7. Option: If you would like to have leaves for your pumpkin to sit on, you will need an assortment of fabrics for your leaves. Great time to utilize your scrap stash! I drew my leaves out using Steam-and-Seam to iron on the leaves to the pumpkins. However, if you are not confident in your artistic abilities to draw leaves, you can google fall leaves images and use those to trace and cut {Tip 3}. (See image 9)
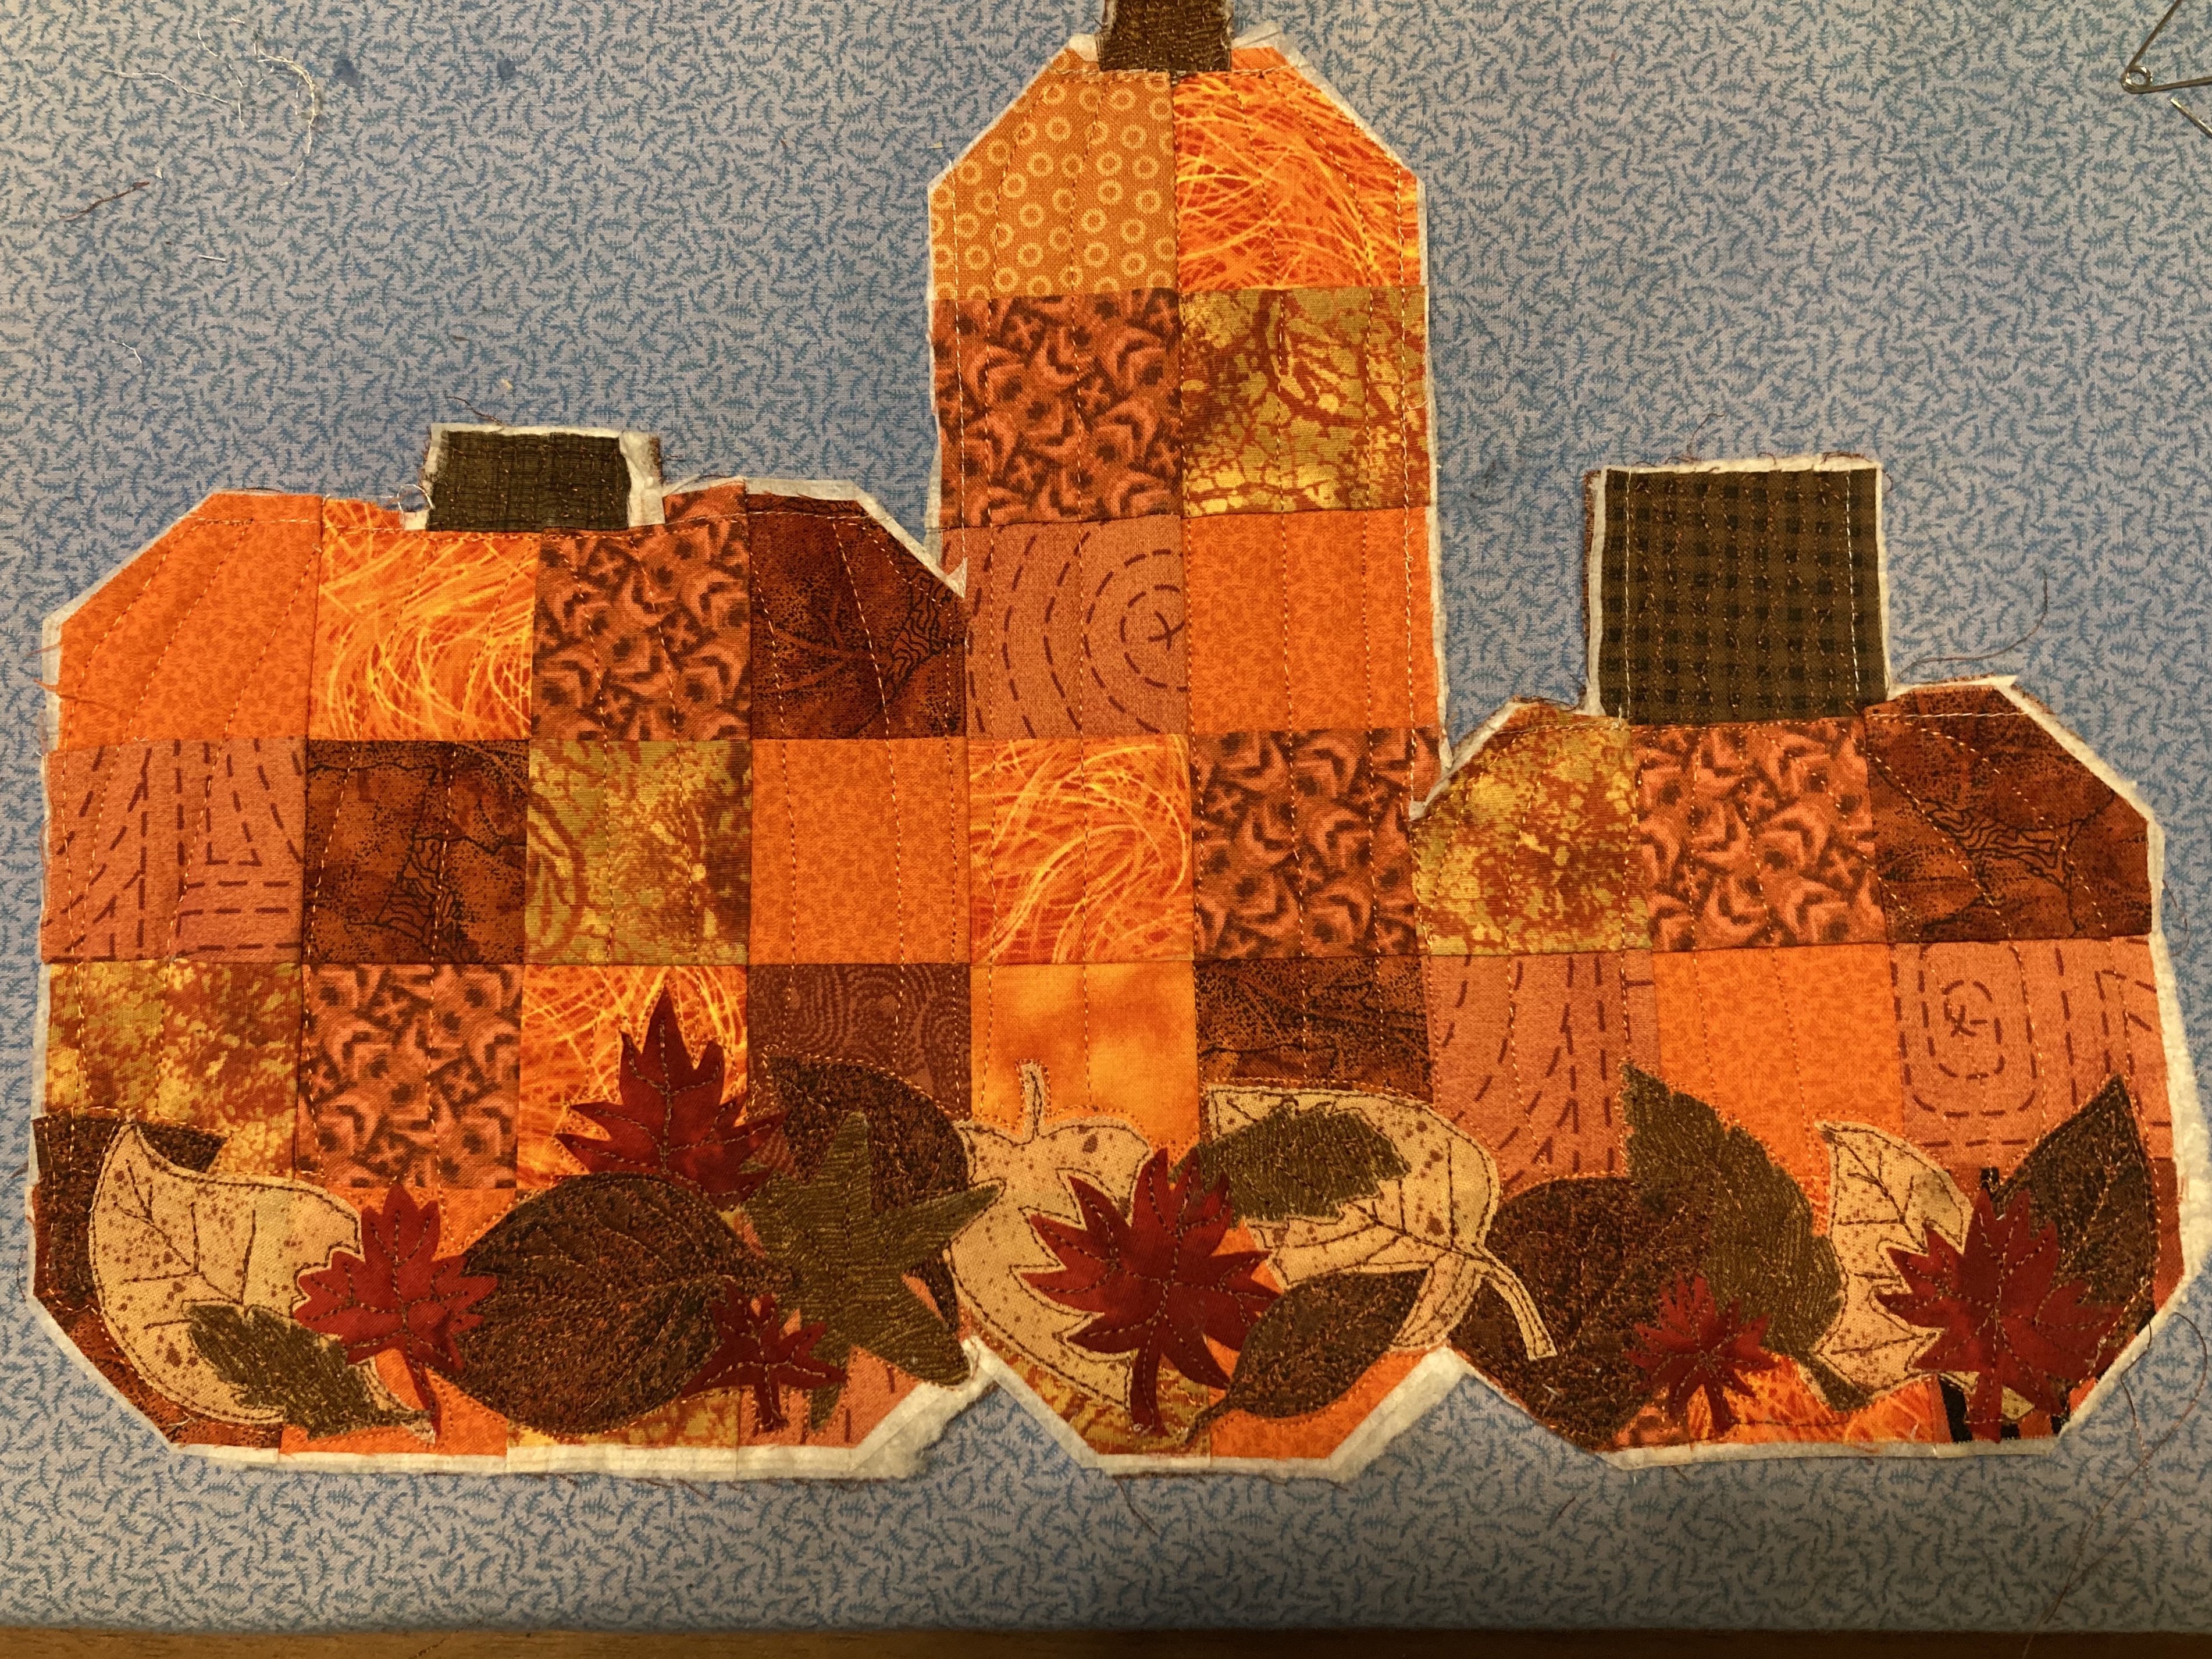
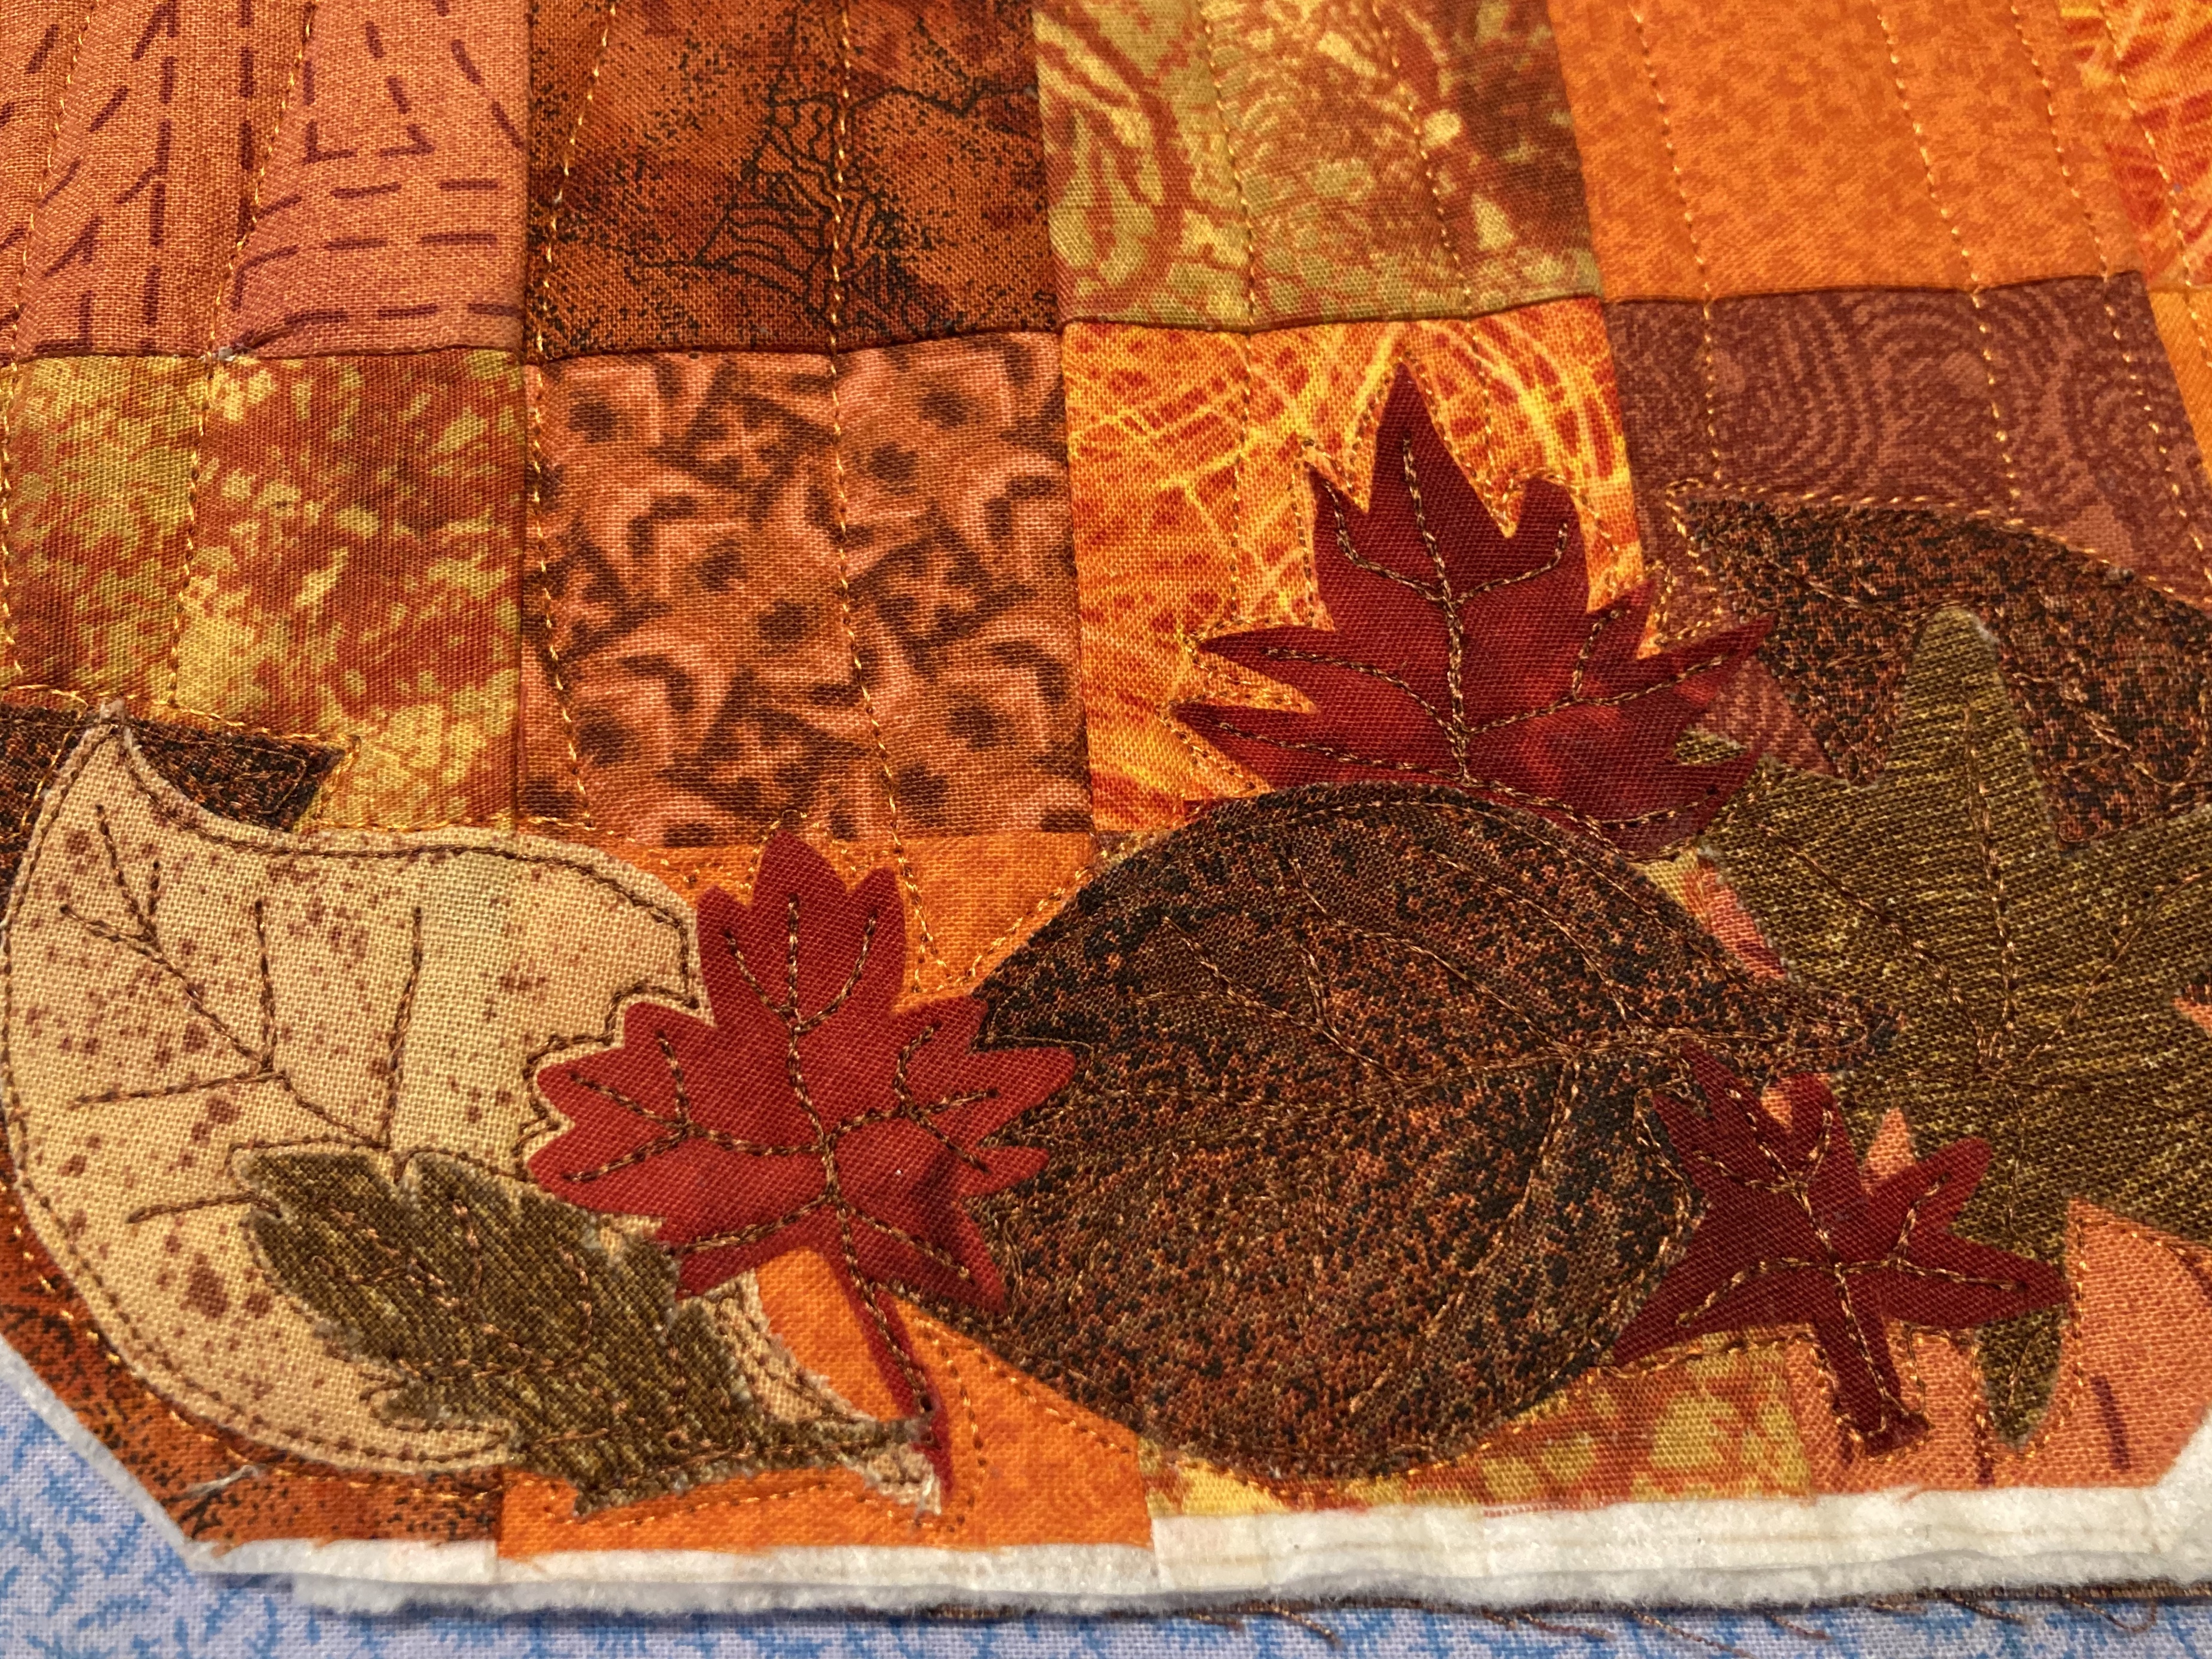
8. You can either sandwich, bind, or have raw edges if you would like to finish your pumpkins {Tip 4}. At first, I tried sandwiching; however, I had difficulties with the corners not laying flat (if anyone has suggestions on how I could have avoided that, I would love to hear them)! I eventually decided to bind, so I layered my backing fabric, batting, and pumpkins. I love free-motion quilting, so I gave my pumpkins their lines and the leaves some detail. (See Image 10 and 11)
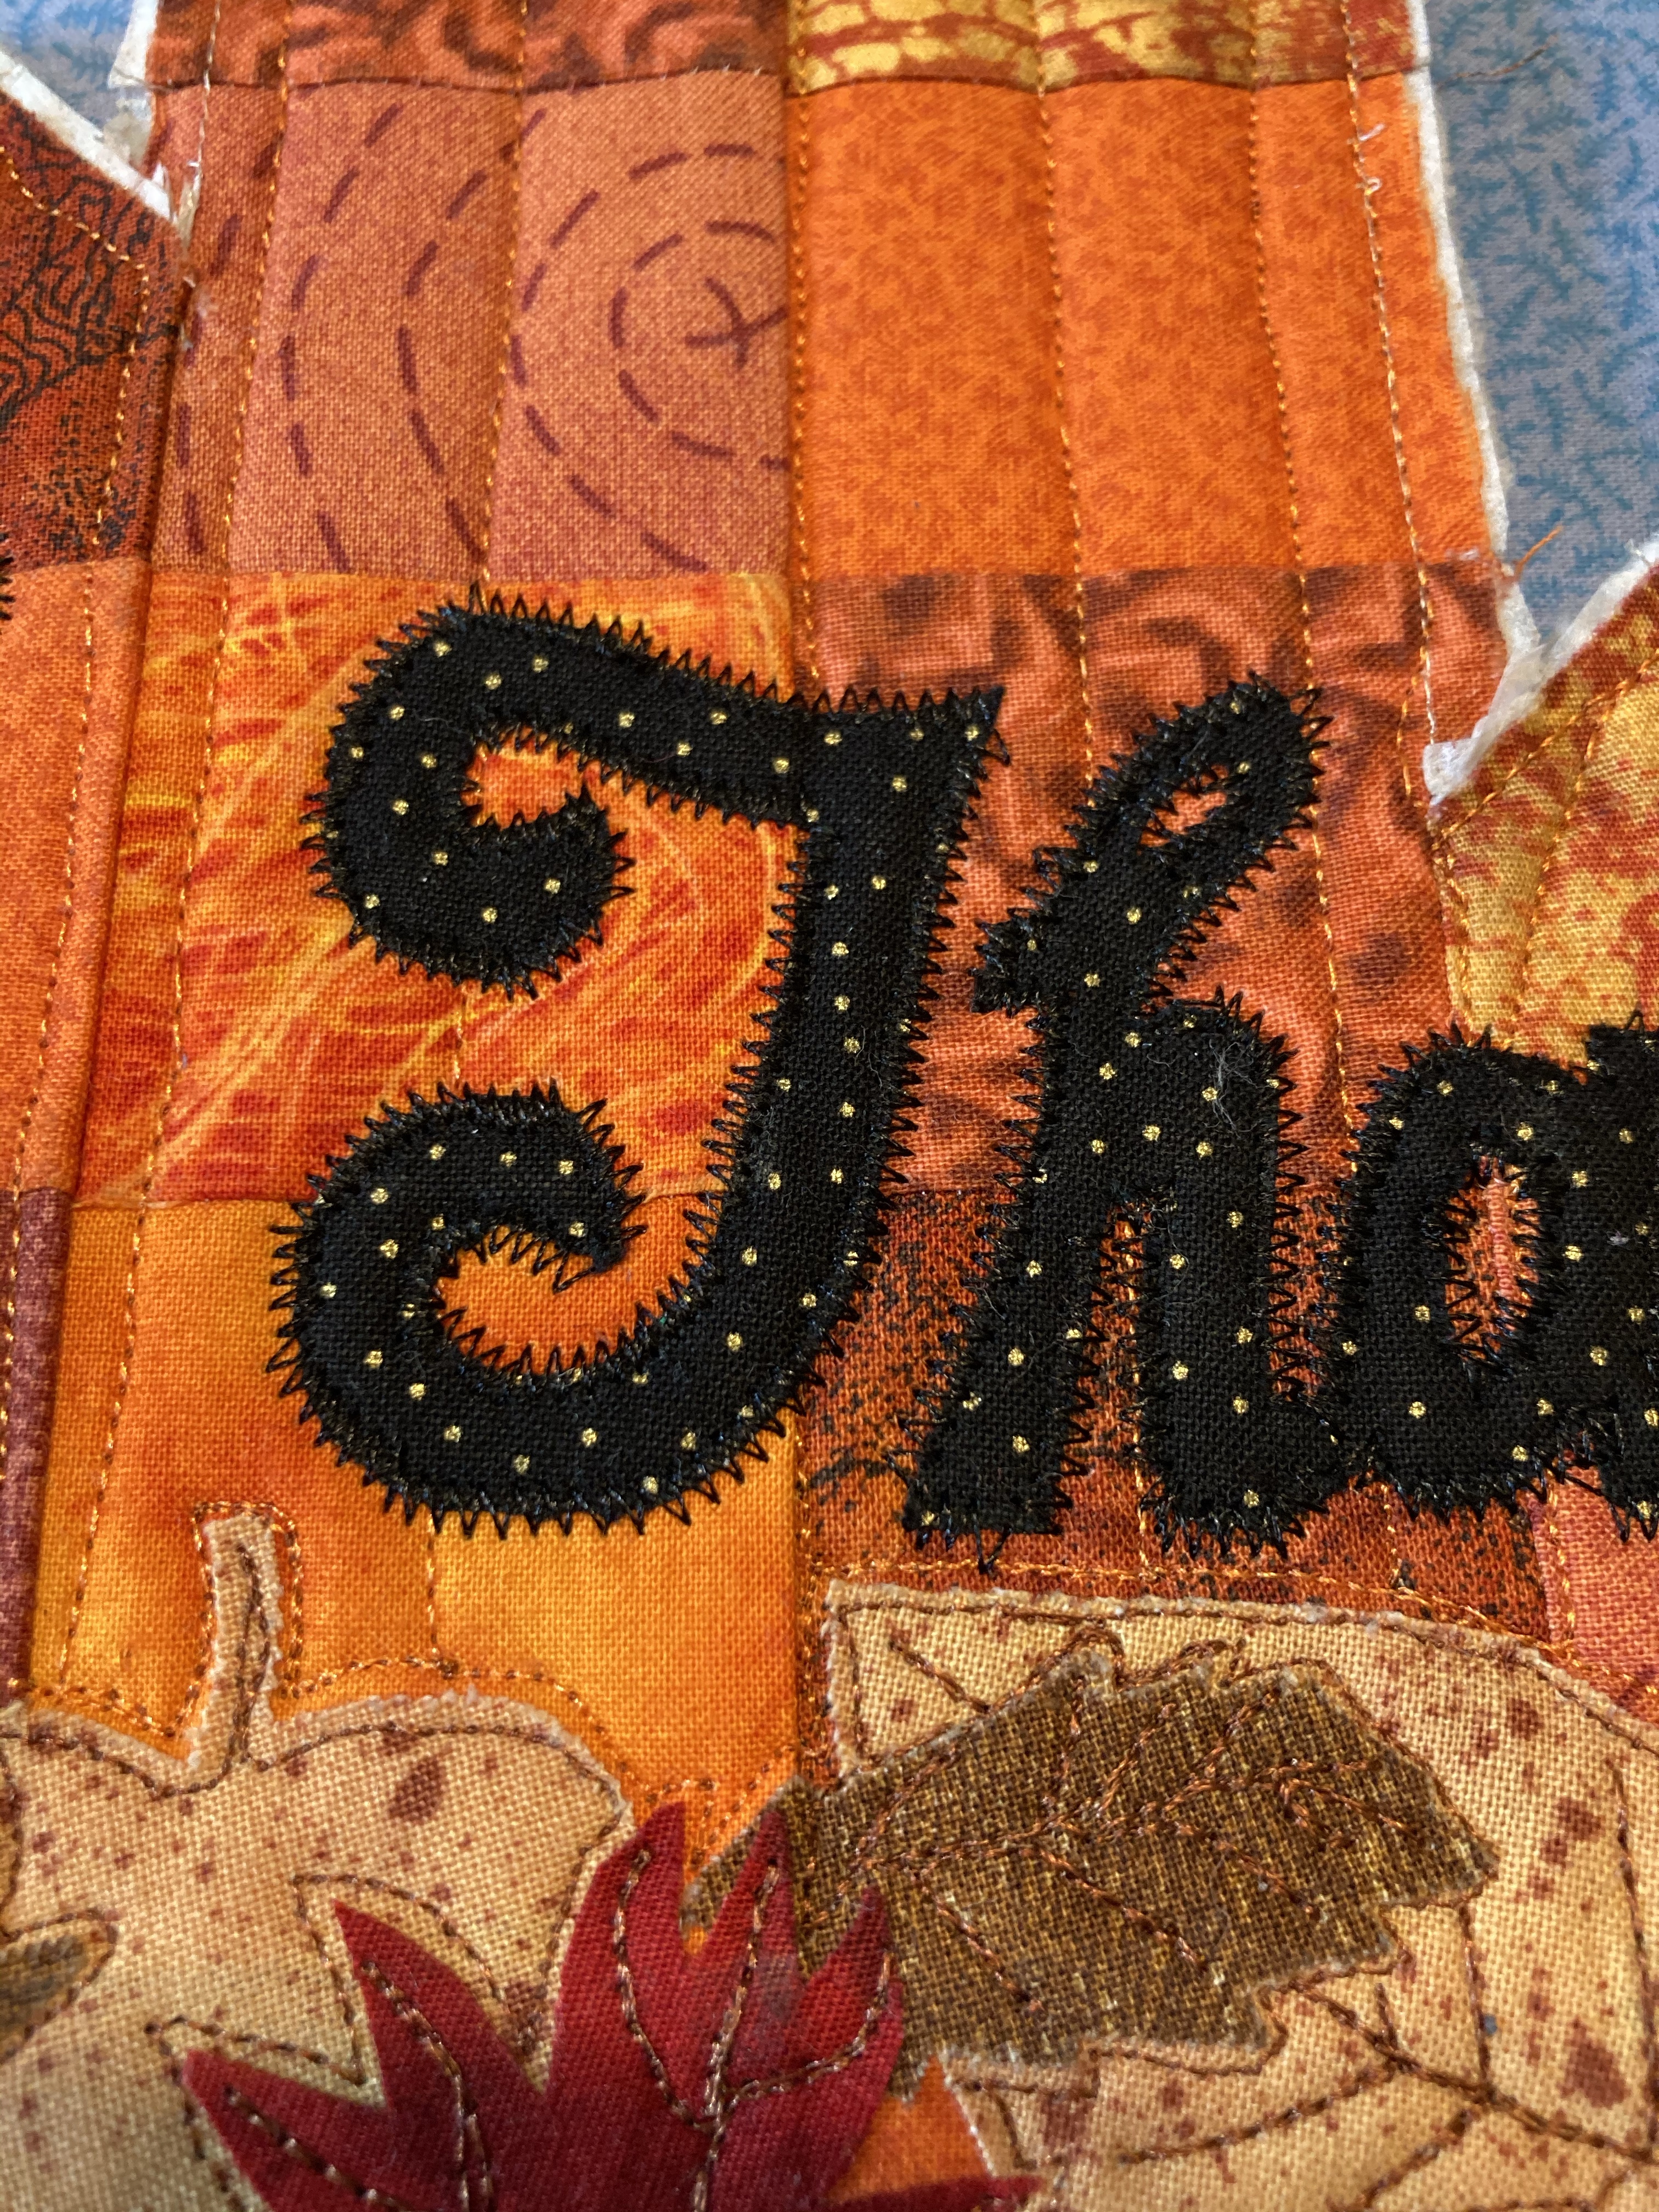
9. Option: If you would like to add words to your pumpkins, you can either use Steam-and-Seam, fabric pens/paint, or machine applique if your machine has that ability! I used a simple zig-zag stick around the letters. “Give Thanks” came from the song Give Thanks by Don Moen to make my pumpkins for the entire fall season. If you would like them to be more Halloween themed, use this same technique, but give them faces!


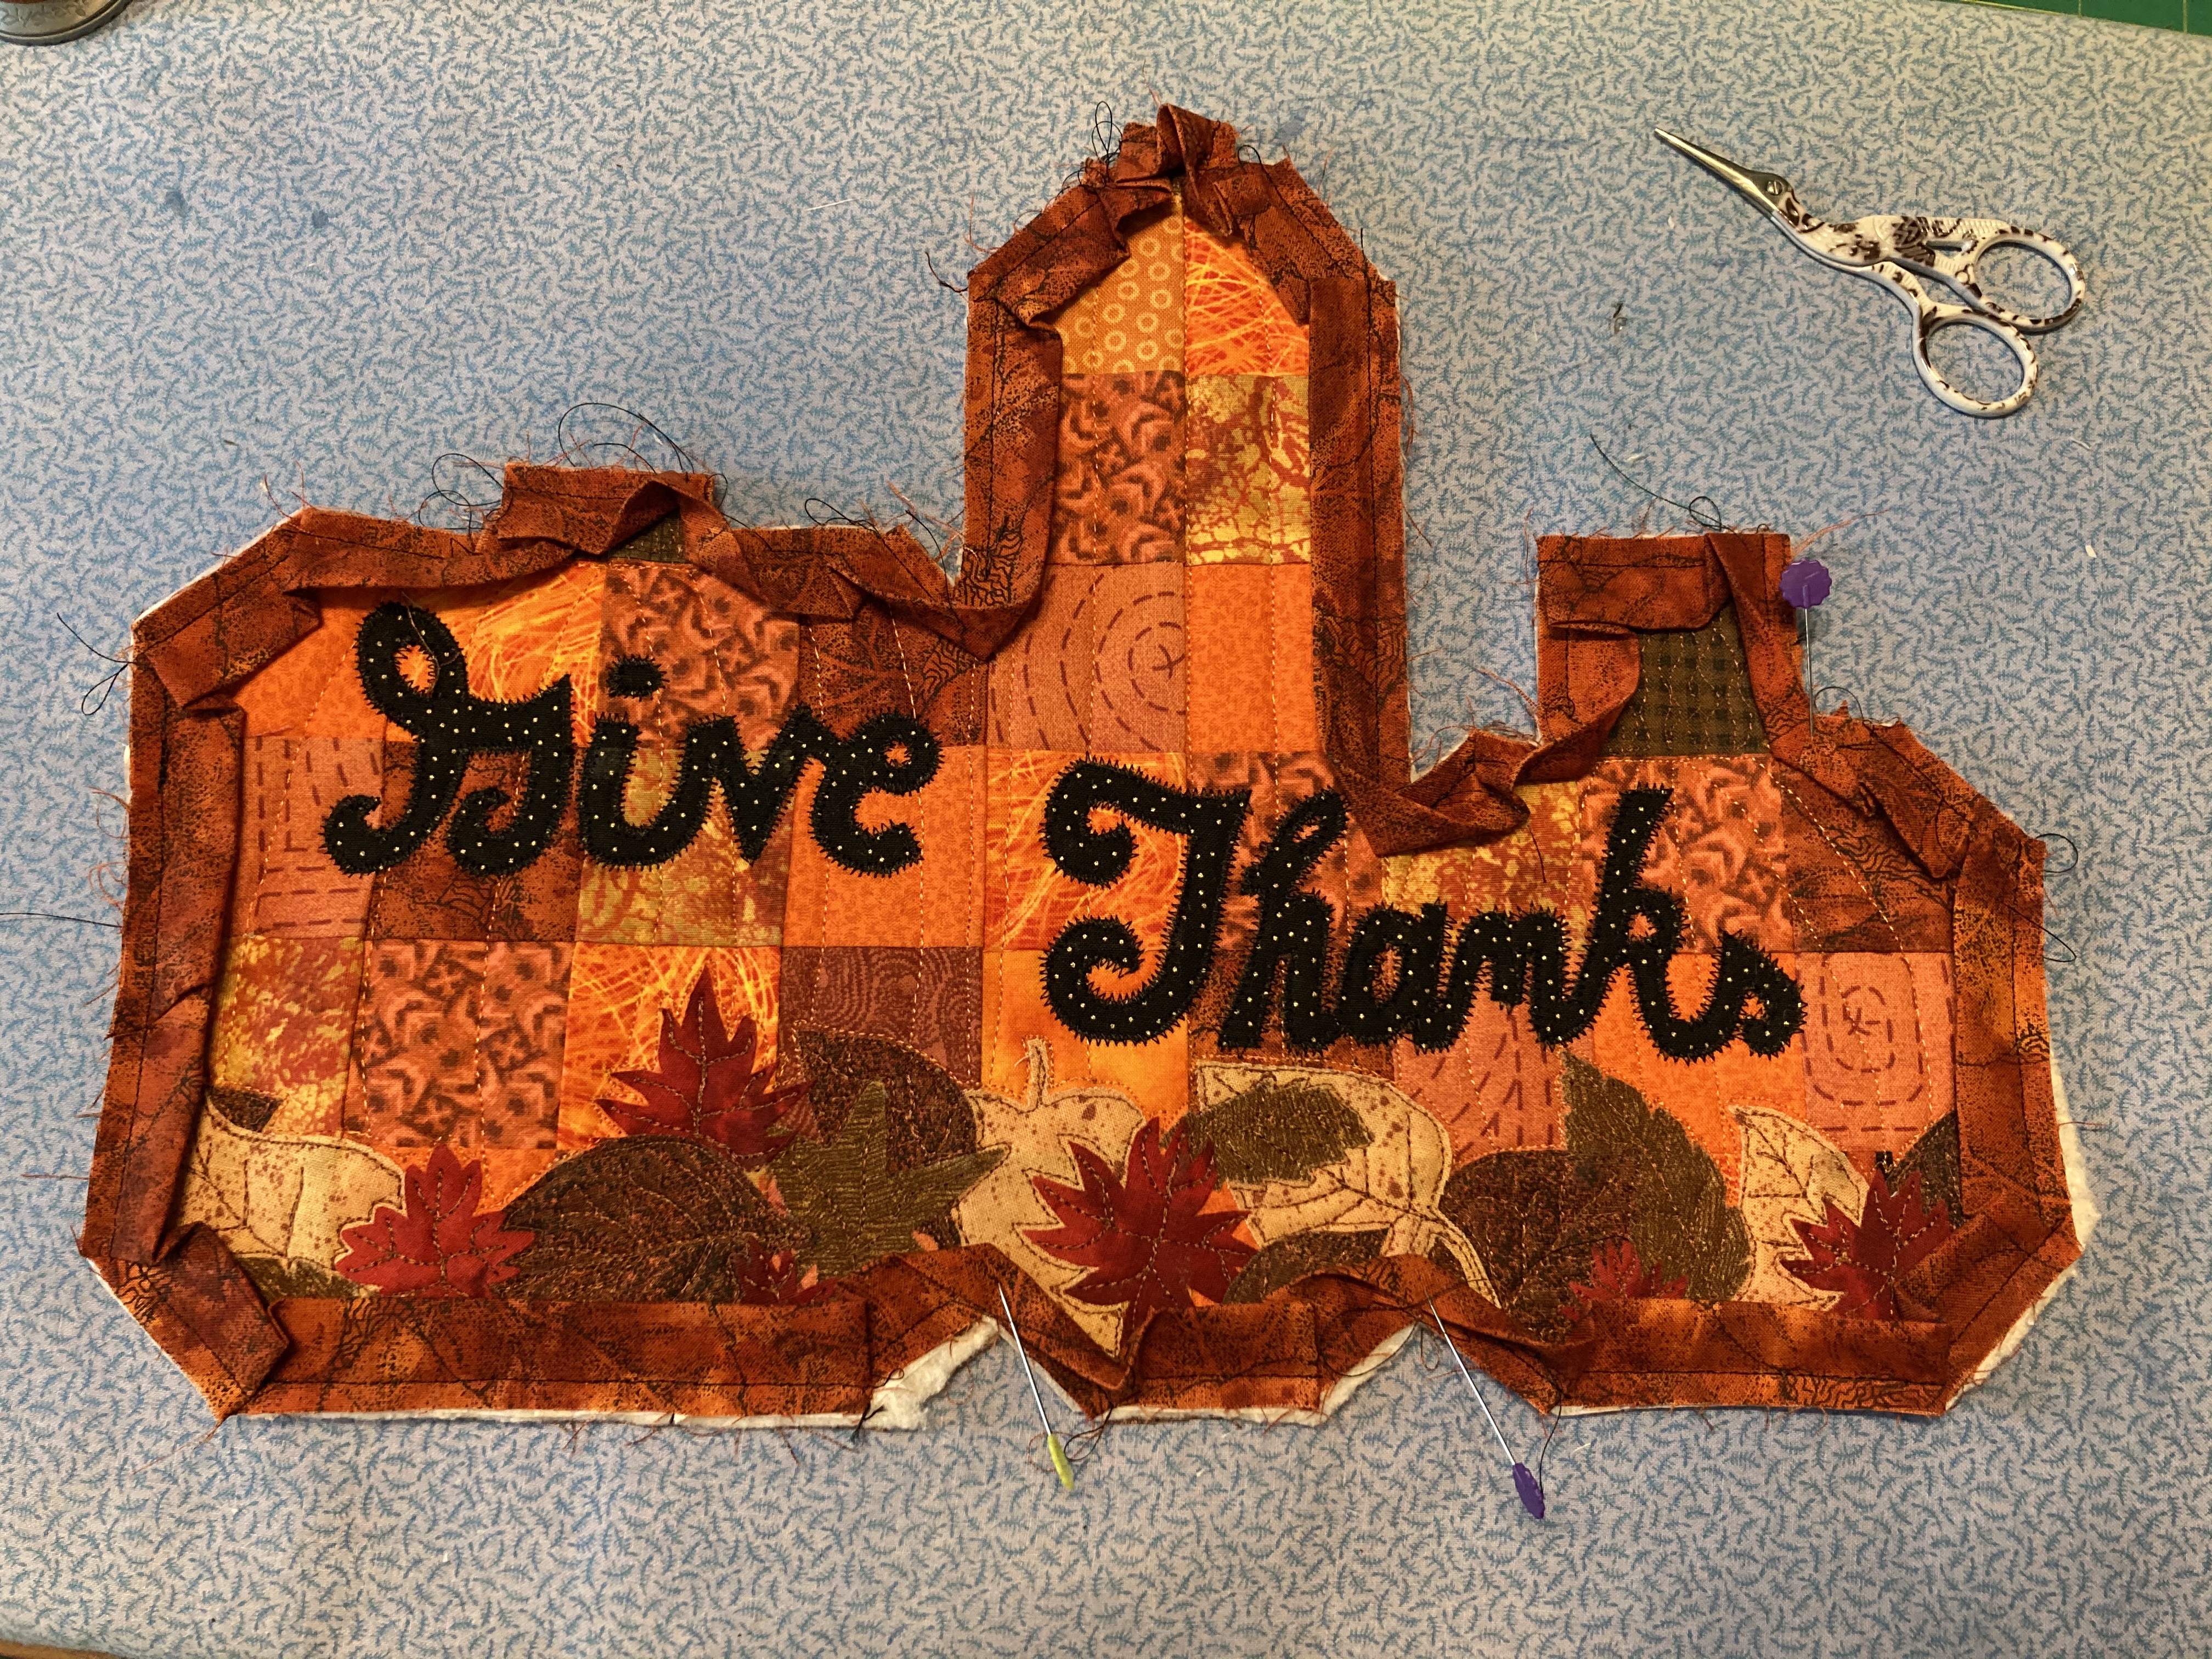

10: Almost done! If you decided to bind, this might be difficult. To help you with the corners, check out part 1 and part 2 of the binding with irregular corners video. You may have to fudge a bit, but luckily you will be hanging it on your door, so no one will see the back! Another idea would be to use ribbon or rick rack to hide the raw edges. Otherwise, keep the raw edges if that is your style! {Tip 4}
11. Finally, you will need to add some way to hang your beautiful creation! I found that it was a little too flimsy just hanging it by ribbon, so I utilized a wire hanger to outline my pumpkins for stability (See image 18). I used pliers to mold the hanger to outline the top of the pumpkins, and then I stitched around the hanger to attach it to the quilt.

This project took me about two days to complete. If you do not use binding, it will be faster to make! This is the first time I have created directions for something I have made. If you do make this project and find the directions lacking in detail in a certain area, please email me so I can help you and fix the problem!
Tips (from my mistakes):
- For the first and second pumpkins, the stems split two rows; therefore, you will have to sew through the stem. Thus if you want different sized stem, first identify what size stem you would like, and then add 1/2” seam allowance to both sides. For example, if you would like your stem to be a 1” x 2” stem, you will need to cut the brown fabric as a 1 1/2” x 2 1/2” rectangle. However, if you are using the quick grid that does not have extra space, then you should cut the rectangle as a 1 3/8” x 2 3/8” rectangle.
- If you are not an experienced quilter, I would go with the raw edge or ribbon finish to the sides of your quilt. Binding took awhile, and it was difficult due to the interior angles of the pumpkins. To avoid this, square pumpkins would prevent this. You could also make a square wall hanging with this pattern, by adding a sky and ground.
- You can also use this technique to make curler green vines and leaves for the pumpkin. I tried this, but because my stems are brown, I thought it incorrect to give my pumpkins green vines. However, this is your project, so have fun!
- Because I tried to sandwich first, I cut off my extra fabric on the sides. This made it a little more difficult to bind, so I suggest picking a technique and then sticking with it. If you decide to bind, the interior angles are difficult especially around the middle pumpkin. I cut my binding smaller than I normally do because I thought it would be better with a smaller project. This was an incorrect assumption on my part. I would recommend cutting the binding at 2 1/2” to give you plenty of fabric to work with.
- This project is small. If you are interested in making a larger version, I would recommend adding rows and columns to your pumpkins. For example, instead of a 4×4 block pumpkin, make it 6×6. You will need more orange fabric for this.
Thanks for reading! I pray God blesses you during this fall season.